|
SkyJacker Transfer Case Shifter Bracket
on 2004 Jeep TJ Rubicon We decided to install SkyJacker
transfer case shifter bracket replacement along with the JKS motor mount
and body lifts. We'd experience a couple of these first hand and really
liked both the idea of disconnecting the TC shifter from the body and
the way the TC shifted after the SkyJacker bracket was installed.
Tools Needed
-
9/16" Ratcheting Closed End
Wrench
-
Channel Lock Pliers
-
Large Flat Screwdriver
-
Metric & SAE Socket Set
-
Metric & SAE Combination
Wrenches
-
T-45 Torx Socket
-
Hack Saw
-
Cordless Drill with Sockets
(nice to have)
Additional Parts or
Supplies
Instructions
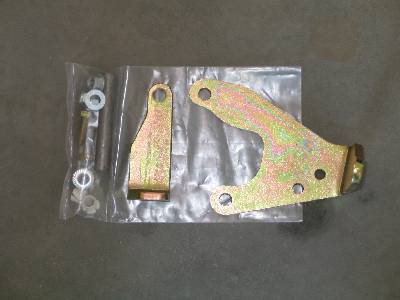
The SkyJacker TC shifter bracket replacement kit doesn't contain a
lot of parts (see Photo #1 below) but there are a few tricks to
completing the installation successfully.
Note: This installation was performed on a Rubicon with the standard
5 speed NV3550 transmission. If your installation is on a different
vehicle or a vehicle with an automatic transmission many of the tips
contained in this write-up will not apply.
Shift your TC into 4Lo before you begin. Follow the SkyJacker
instructions #1 - 3.
Photo #1: SkyJacker TC Shifter Bracket
and Hardware
After step #3 in the SkyJacker instructions,
remove the shifter console. It is virtually impossible to reach the top
TC shifter stud/nut from below. To remove the console:
-
Remove the shift pattern plate from the shifter
knob. This is most easily done with a small flat blade screwdriver. Slip
the blade of the screwdriver under the plate lip (there is a wide lip on
the plate that is about 1/8" below the plate surface) and gently pry up
and slide the screwdriver around. Once you have about 1/4 of the plate
pried up you should be able to pry the plate out of the knob.
-
Remove the shifter knob by loosening and
removing the lock nut and then unscrewing the knob.
-
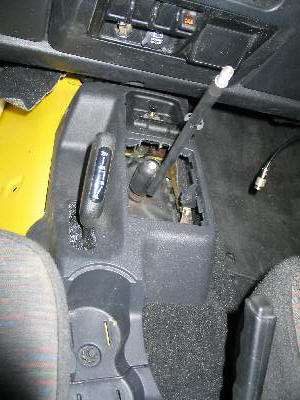
Place the blade of a small, flat screwdriver
between the console and the shifter boot and pry forward and upward to
remove the shifter boot. It may help to squeeze the sides of the boot
inward as you do this. Slid the boot off of the shifter. Your console
should now look like Photo #2 below.
Photo #2: The Shifter
Console with the Knob and Boot Removed
-
Remove the Torx bolt holding the shift lever in
place.
-
Pull the shift lever off of the stud
-
Remove the rubber cup holder liner from the
console by pulling upward.
-
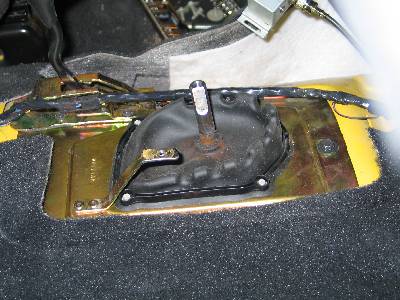
Unscrew the two hex-head screws holding the
front section of the console in place - one is under the cup holder
liner, the other is just to the right-rear of the shift lever. It
connects to the S-shaped bracket visible in Photo #3 below.
Photo #3: The Shifter Stud
and Body Mounting Plate
-
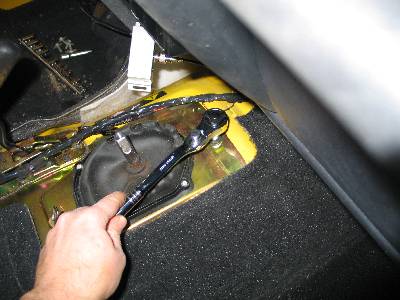
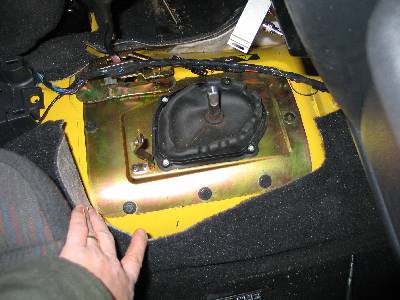
Remove the hex-head screws holding the body
mounting plate to the body. (see Photo #4) I used my cordless drill to
remove all of the hex-head screws except the one with the ratchet on it
in Photo #4. This saves quite a bit of time.
Photo #4: Removing the
Body Mounting Plate
-
As you can see in Photo #5, below, several of
the hex-head screws are under the carpet on the passenger side. Pull the
carpet back and remove these screws.
-
You will also need to remove the smaller
hex-head screws that hold the passenger side of TC shifter body plate in
place and loosen the screws on the driver side.
-
If you have not previously removed this body
plate it may be stuck to the body with sealant and you may have to pry
it up with a large flat blade screwdriver.
Photo #5: Body Mounting
Plate Screws Under Passenger Side Carpet
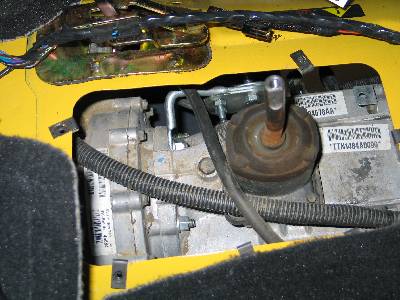
Once you remove the body mounting plate you
will have relatively easy access to the TC shifter mounting bracket's
top stud/nut. The bracket and the nut are visible just to the left of
the shifter in Photo #6 below. The bracket is made of round stock with
flat ends and is bright silver in Photo #6.
Photo #6: View of the
Transmission and TC Bracket through the Shifter Opening
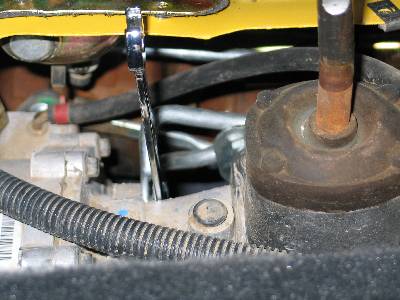
Remove the top nut from the TC shifter bracket
by reaching through the opening in the body with a 9/16" ratcheting
box-end wrench. (see Photo #7, below, for reference) If you have a
fine-tooth ratchet wrench this will work even better. My wrench was not
a fine-tooth ratchet and I could only get about one "click" with each
action. There is not much space to work with (see Photo #8 below) so
you'll need patience and a lot of arm action to remove this nut.
Note: When we attempted to remove the nut, the
entire stud came out of the transmission. When we put it back in, we put a
little red Loc-tite on it to keep it where it belongs. It didn't cause
any problems but we wanted the nut to come off and the stud to stay in if
we ever had to remove the SkyJacker bracket.
Photo #7: Ratcheting
Box-end Wrench
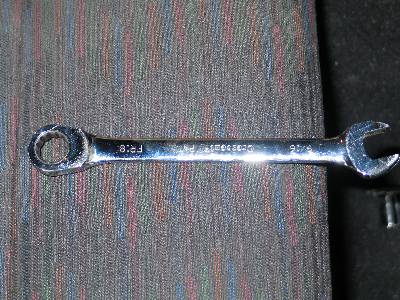
Photo #8: Ratcheting
Box-end Wrench in the Opening
Step #4 of the SkyJacker instructions tells you
to dismantle the shifter mechanism and use a pry-bar or large flat blade
screwdriver to pry the torque shaft rod from the range lever and the
shift rod from the TC shift lever assembly. They obviously have better
tools than we do ... right ... because no amount of prying will work.
The only way we were able to remove the two rods
was to completely remove the brackets from the body and the
transmission, allowing the linkage to dangle and discarding the body
mounting bracket, and then use channel lock pliers to put pressure on
the small tip of each rod with the bottom jaw of the pliers while
putting the top jaw on the range lever and shifter lever. This step,
alone, took nearly 45 minutes!
Once you have the shifter assembly removed,
assemble the SkyJacker bracket as illustrated in the instructions. We
left the shifter rods attached to the body and removed only the torque
shaft with the attached shifter brackets.
Step #6 of the SkyJacker instructions says to
cut the torque bracket ends off flush with the top-hat Teflon bushings.
We left about 1/8" on either side to compensate for any side-to-side
movement of the torque bracket.
Photo #9: The SkyJacker
Bracket Installed and Range Lever Ready to be Installed
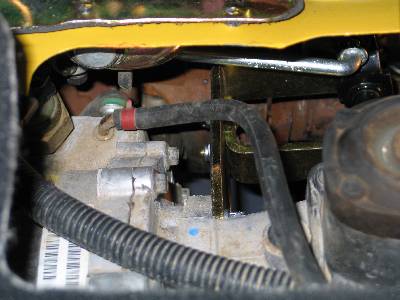
With the torque bracket/SkyJacker shifter
bracket assembly complete, attach the new SkyJacker bracket assembly in
the same location as the original bracket. Hand tighten the nuts on the
studs. In the photo above, you can see the gold-colored bracket mounted
on the original studs and the torque shaft rod ready to be inserted into
the torque bracket.
Insert the shifter rod into the shifter bracket
from below the Jeep using channel lock pliers to push the tip of the rod
through the opening.
Insert the torque shaft rod into the torque
shaft from above using channel lock pliers to push the tip of the rod
through the opening. (see Photo #10 below) Note that the bottom jaw of
the pliers is on the rod and the top jaw is on the metal or the torque
bracket.
Photo #10: Using Channel
Lock Pliers to Re-insert the Torque Rod

Lower your jack. Tighten up the bolts on your
transmission mount and skid plate and temporarily tighten down the gold
body mounting plate for the TC shift lever (#2 in Illustration #1
below). You will loosen it up again after you have made any necessary
adjustments to the torque rod (#5 in Illustration #1 below).
After the transmission and skid plate are
torqued down and the TC shifter body mounting plate is tightened down,
slip the shift lever back onto the stud and remove all tools from under
and around the Jeep and start the engine. With the TC shifter in the 2Hi
position, put the Jeep in either first or reverse and attempt to drive
or back out of your shop/garage. Drive slowly and carefully as the TC
may not completely engage and you don't want to chew up the TC during
this test.
If the Jeep moves as expected in 2Hi, find a
flat, level area where you can test 4Hi and 4Lo shifting. Test 4Hi and
4Lo to see if they work as expected. Watch for the dash lights to come
on as you shift your transfer case. Be sure to test your lockers in 4Lo.
If 4Hi and/or 4Lo do not work as expected, you will need to adjust the
torque rod by loosening the trunion lock bolt and moving the torque rod
forward or backward as needed. It's usually easiest to make these
adjustments with the TC shifter in 4Lo.
If you are not familiar with trunion
adjustments, see Illustration #1 below. You will loosen the trunion
Lock Bolt (#4) and slide the Selector Rod (#5) until you feel the
transfer case click into 4Lo. You may also need to move the transfer
case shift lever while holding the selector rod in place.
Illustration #1: Transfer
Case Shift Lever Assembly

We had to make a minor adjustment in the shift
linkage. After doing so the TC shifts like never before.
Once your adjustments are complete, re-install
the shifter console and go wheelin'!
Installing the SkyJacker
TC shifter bracket at the same time as the body lift and motor mount
lift makes a lot of sense since you're working on a lot of the same
areas. We highly recommend the bracket and installing it at the same time
as a body lift/motor mount lift.
|